How to make a DIY Shadow Lantern on a Budget | Learn how to turn an IKEA Rotera Lantern into a DIY Disney Peter Pan Shadow Lantern with this easy tutorial. A perfect weekend craft project you can make in under an hour for less than $10. Customise your lantern for a birthday present, handmade Christmas gift idea, custom home decor piece or whatever you fancy. Made with the Cricut Maker and adhesive vinyl.
Our Disneyland trip is just 41 days away - so naturally, all of our free time has been filled with Disney things. Jesse and I have been making t-shirts with our Cricut Maker, and this weekend we decided to come up with a super quick weekend project.
This Shadow Lantern is SO simple to make. It can be made for less than $10 and in less than half an hour - and you can customise it to create any theme you like.
So what are we waiting for?
Let me show you how to make it!
Let me show you how to make it!
What you'll need:
- A Cricut Maker (or other Cricut/cutting machine)
- A lantern (I bought this one for $6 from IKEA)
- Adhesive vinyl
- Transfer tape
- Rubbing alcohol
- Paper towel
- A candle
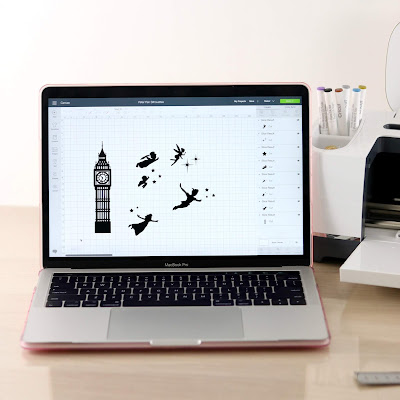
To start, you'll want to decide what silhouettes you want your lantern to reflect (see the video below to see what mine looks like!)
I went for a Disney Peter Pan theme for my lantern (which you can use here if you have Cricut Access). Note: The images used here are a mix of royalty free images (Big Ben) and digitally drawn images. Disney owns the rights to these characters and their likeness and these files cannot be used for items you intend to sell.
You want to find something with thick lines to cast the best shadows.
Next, you'll want to measure your lantern to work out how big your design should be.
If you're measuring in centimetres, click the menu bar on the left hand of Cricut Design space, select settings and switch the measurements to Metric to make it easier to size your design.
I then created six rectangles in the exact dimensions of the glass panels of my lantern to work out the placement for each of my characters. You won't print these rectangles - they're just a size guide.
Once you've worked out your design and sizing, it's time to cut.
Delete your rectangles and move your cut pieces around on the mat to minimise vinyl wastage.
Tip! I cut intricate vinyl designs on the Washi Sheet setting to ensure the small pieces stay in place and there are no tears.
Once your design is cut, carefully weed out the excess vinyl.
Tip! To minimise wastage, I trim my vinyl pieces and save the scraps before weeding. I then use these scraps when I need to cut a small design.
Apply your transfer tape and remove your design from the mat, cutting each section into pieces so it's easy to apply your design.
Before applying your design, clean your lantern using rubbing alcohol and a piece of paper towel. I use Isocol which can be purchased from Coles or Woolworths.
Cleaning your lantern before applying your vinyl ensures it is smudge free and will stick properly. Also clean the tips of your fingers so you're not adding any oil or dirt to your lanter when applying your design.
Carefully apply each of your designs to the outside of your lantern.
You'll want to use a mid-tack transfer tape rather than a strong grip transfer tape for this project as you may have trouble removing your decal from the transfer tape if using strong grip.
Once your design is on your glass, it's time to add your candle!
And that's all it takes! In under half an hour and for less than $10, you have a gorgeous lantern that would make a perfect gift!
This would be a perfect Christmas or Birthday Gift on a budget as it can be made to suit just about any person. Try a Christmas theme for Christmas, their favourite movie or hobby - or let your imagination run wild!
This post may contain affiliate links.


Hi! I love this idea and went to open your project, but the "make" button is disabled. I am a cricut access subscriber. Do you have any idea what might be wrong?
ReplyDeleteHey Amy! Cricut has changed how they do things so that link now doesn't work. Here's one SVG I found online that's a free download and very similar to what I had: https://www.geeksvgs.com/id/32182
DeleteLove this idea. I love how your images reflect on the wall. Mine are not doing this. Any idea why?
ReplyDeleteHey! It has to be quite dark and the lantern has to be closer to the wall to reflect the image. That may be the issue!
DeleteAlso, if you're using a really small candle or battery operated candle, it might not be casting out enough light.