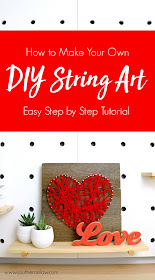
Somehow the first month of 2018 is already at it's end. I don't quite know how that happened - but I do know what that means...
It's time for a new decor theme!
And with a new decor theme, comes a new DIY project! For February, I decided I'd go with a Valentine's theme. Because, whilst Jesse and I may not celebrate Valentine's Day, it was the perfect excuse to use ALL the pinks and reds and cute heart things.
This month I knew I wanted to try a craft project that I'd never tried before. I'd seen string art all over the internet and always wanted to try it myself - so this month I bit the bullet and did it and I was super surprised by how easy it was!
So let me show you how to make your own DIY String Art, step by step! >>
Before you can do anything, you'll need to get all of your bits and pieces together.
What You'll Need to Make This Project:
- Wood (we used old fence pailings - but you could use pallet wood or something already finished like this)
- Sandpaper
- A saw (if cutting your own wood)
- Nails (we used all-purpose wood nails)
- A hammer
- Scissors
- Yarn or string (we used a small ball of yarn as it was much cheaper)
- Your design drawn or printed on paper
First, you'll want to decide how big you want your string art to be.
We decided on a 30cm x 30cm square (as our fence pailing was 10cm wide) and cut the fence pailing into three 30cm lengths with a saw. We then sanded down the boards and fixed them together by nailing a space piece of wood across the back (as shown).
Once you have your "board" ready, it's time to nail it!
As I had a back piece that held my board up off the ground, I grabbed two spare pieces of wood to prop the board up so everything was even (this way I wouldn't split the board in two when hammering on the edges!).
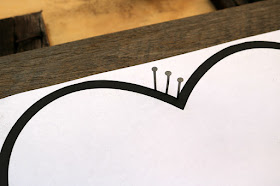
Then, simply lay your template (mine was just an outline of a heart printed onto A4 paper - but you can do any shape/word etc) on top of your wood board.
Continue hammering all the way outside your template. I put my nails closer together on the curves (to get a neat curve) and further apart on the bottom - but \you could probably get away with the wider spacing over the whole design.As I had a back piece that held my board up off the ground, I grabbed two spare pieces of wood to prop the board up so everything was even (this way I wouldn't split the board in two when hammering on the edges!).
Then, simply lay your template (mine was just an outline of a heart printed onto A4 paper - but you can do any shape/word etc) on top of your wood board.
Then, all you have to do is hammer nails all the way around your template. This is a super easy way to do it as you can see exactly where you need to hammer next (and don't worry, you peel the paper off later!).
You want to leave about 1 cm of space between your board and the nail head - and you want to try and get them as even as possible. Don't worry if they're not perfectly even -mine weren't!
If you hammer a nail in and find it's really crooked, simply take it out and try again!
WARNING! This is NOT a project you want to do in the night, early morning, when someone is sleeping or when you or someone else has a hangover or headache. It's quite noisy.
Once you've hammered nails all the way around your template, it's time to peel off the paper!
Carefully peel off the paper, ensuring no little bits of paper remain behind (we didn't have a problem with any paper leftover - but if you did, use tweezers to get the tiny pieces out).
Once your paper is removed, you should see the outline of your shape!
Then it's time to get your string out! I started at the bottom point, tying a double knot in the end of the string and leaving a "tail" to help secure the final design.
You'll want to start with your outline first, bringing your string all the way around the outside of the nails. When you get to a point (like the top of the heart), I find it's best to go around that nail and then back on the outside of the shape again.
Once you've gone around the outline of your design, simply weave the string around the shape, from nail to nail and side to side. There's no real pattern or rule you have to follow here - so do whatever you think looks best.
After I finished weaving my string all the way around, I outlined the shape once again and tied the end of the string to that "tail" I left at the beginning, securing it with a double knot and cutting the tail and end of the string off.
And that's all it takes!
You can use this tutorial to make just about any shape you like. I'm planning on doing a bunny outline for easer, and a few monogram ones for friends of ours. The possibilities are only limited to your imagination!
But tell me, do you celebrate Valentine's Day?
And what's your favourite colour?
Also, tell me - what kind of craft/DIY project would you like to see next?
And what's your favourite colour?
Also, tell me - what kind of craft/DIY project would you like to see next?
This post may contain affiliate links.


No comments:
Post a Comment
There is nothing better than reading your comments on our posts! Let us know what you think of this post!