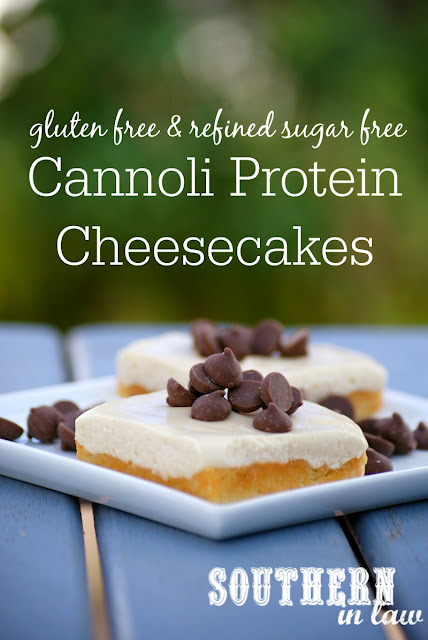
This recipe was the result of a hugeeeeeee tub of ricotta that needed to be used up, combined with a cheesecake craving. The first time I made it, it was a little bit of a flop - but a delicious one at that.
I overestimated the powers of gelatin and ended up with an awesome tasting filling that was more like pudding than cheesecake - but that just meant we had to gobble it quickly to perfect the next batch, right?
The next time I made a batch, I perfected the recipe and Jesse hasn't stopped asking me to make it since! It's the perfect indulgent yet dessert or snack with a whopping 15 grams of protein per serve!
Whilst it is a protein packed snack, it's the perfect secretly healthy dessert to serve up to friends as it feels incredibly decadent. Unflavoured whey protein is the secret ingredient that gives this cheesecake its creamy flavour as well as a huge protein boost. Whilst you could use other protein powders, we don't recommend it (unless it's vanilla whey) as you will completely change the taste and end result of your cheesecakes!
But enough yapping, let's get to eating!
Let me share the recipe with you! >>
Healthy Cannoli Protein Cheesecake Recipe serves 8-9
low fat, gluten free, high protein, low carb, refined sugar free
For the Crust:
1 cup (100g) almond meal/almond flour
1 1/2 tbsp (25g) butter/coconut oil/reduced fat spread or applesauce* (see notes)
2 tbsp (15g) unflavoured whey protein**
For the Healthy No-Bake Cheesecake Filling:
1 cup (250g) ricotta (reduced fat or full fat both work!)
1/4 cup (60g) reduced fat cream cheese
2 scoops (60g or 1/2 cup) unflavoured whey protein
1 tbsp vanilla extract
2 tbsp maple syrup
2 tsp powdered gelatin
1/2-1 tbsp boiling water
- Preheat your oven to 180C/355F
- Grease and/or line either an 8" tin or 8-9 (8 will be thicker, 9 slightly thinner) individual cheesecake tins (or muffin tins) and set aside.
For the Crust:
- Melt your butter (or alternative) and mix with your maple syrup.
- Add all of your other crust ingredients into your butter mixture, stirring to combine.
- Place your crust mix into your prepared tins, flattening and compacting with a spoon or your fingertips (if it's too sticky/crumbly, slightly wet your fingertips/spoon)
- Bake your crusts for 5-8 minutes or until lightly browned and firm to the touch.
- Allow your crust to cool completely.
- Add all of your filling ingredients, except for your gelatine and boiling water, into a food processor or your Cuisine Companion. Process for 1-2 minutes on medium (CuCo S8) to combine.
- Scrape down the edges of your food processor to incorporate all ingredients.
- Place your gelatine into a small bowl and pour over your boiling water, stirring to melt and combine.
- Add your gelatine mix into your food processor/Cuisine Companion and process for another 1-2 minutes on high (CuCo S12) or until your mix is smooth and all ingredients are incorporated.
- Pour your filling mixture on top of your cooled crust(s) and chill in the fridge for 3+ hours or until set.
- You cheesecake will keep stored in the fridge in an airtight container for around 3 days.
- To serve, either slice your cheesecake into pieces or remove from tins once set and top with whatever your heart desires or eat as is!
Notes:
- *For a lower fat version, use a reduced fat dairy/non-dairy spread or applesauce instead of butter or coconut oil
- **As I mentioned earlier in the post, I don't recommend using any other protein powder for this recipe as it will change the taste and texture of your cheesecake. The only exception to this would be a vanilla whey protein powder. We highly recommend buying this protein powder for baking (and it's super cheap, even when shipping to Aus!)
- We find it's easier to make these in individual tins/muffin tins instead of a single pan as you don't have to worry about slicing!
But tell me, what's the last random creation you came up with that was a success?
And what dessert would you love to be eating right now?


No comments:
Post a Comment
There is nothing better than reading your comments on our posts! Let us know what you think of this post!