If you've been following Southern In Law for a while, you'd know I love a good project - and this Easter, I may have the easiest project of all for you!
These DIY Bunny Pots are perfect for kids, school teachers, friends and family this Easter and are a perfect way to make a little treat just that extra bit special.
Best of all? They take just minutes to make and will only cost a few dollars. Even if you're a crafting newbie, I promise you can make this!
So let me show you how to make them! >>
What You'll Need:
- Small pots (I used mini terracotta pots from Kmart - also available here or here in bulk)
- Fake greenery or green felt/paper (a great last minute alternative - simply cut your felt/paper to look like grass at the top - if you want artificial flowers/greenery have a look at your local craft store - I found some at Spotlight)
- Small and large pom poms
- A hot glue gun (you can also use craft glue - you'll just need to hold it together to stick it)
- Felt for the feet (you can use two colours of felt to make the feet and paw prints - or you can paint on the paws like I did)
- Easter eggs or Easter treats to put inside
You can do these with larger pots and larger pom poms (or just have teeny tiny bunnies!)
First you'll want to cut two feet out of felt. I freehanded these, making these just a bit smaller than the pom pom "bottom".
Next, add paw prints to one side of your bunny feet.
You could do these by glueing on smaller pieces of felt - but I find the easiest way is to paint them on.
You could do these by glueing on smaller pieces of felt - but I find the easiest way is to paint them on.
I added one big paw pad and four little bunny toes to each foot.
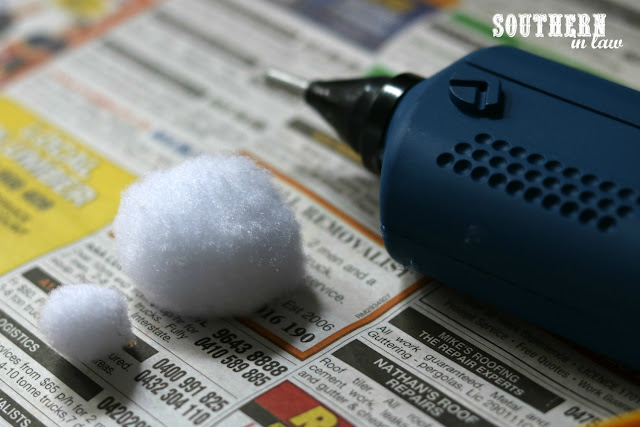
Next you'll want to heat your hot glue gun up and get your pom poms ready.
I used a small and large pom pom in the same colour to make my bunnies - but you could mix it up and use different colours.
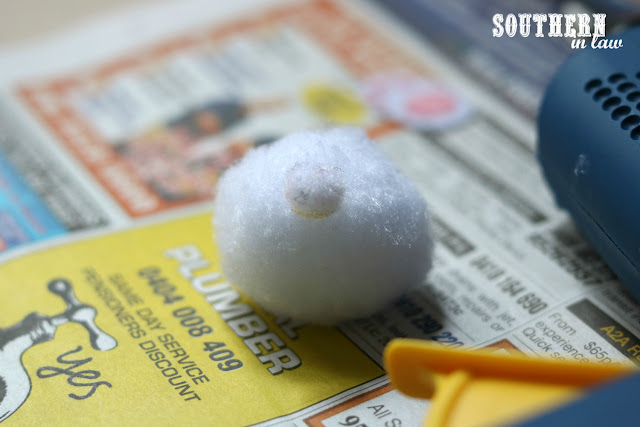
Add some glue to the bottom of your small "tail" pom pom and attach it to your larger pom pom, pressing them together to ensure they stick.
Once your bunny bottoms are stuck together, start getting your greenery ready.
Mine came in small bunches which I cut into smaller pieces and glued to the inside of my pot.
Mine came in small bunches which I cut into smaller pieces and glued to the inside of my pot.
You want to arrange your greenery towards the back of the pot so you have plenty of room to add your Easter eggs or treats!
Once you've got your greenery in, it's time to add your bunny!
Add some glue to the front of your pot, ready to add your bunny.
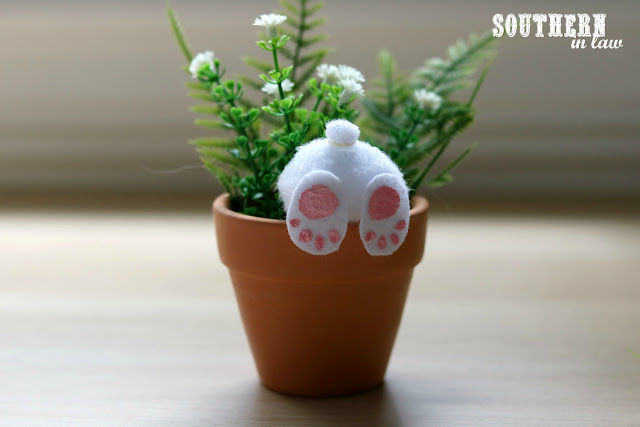
Carefully attach your bunny "bottom" to the front of your pot, ensuring your tail is in the right place.
You want it to look like the bunny is head down in the pot with it's bottom sticking up so the tail should be at the top.
You want it to look like the bunny is head down in the pot with it's bottom sticking up so the tail should be at the top.
Next, attach your feet by adding some glue to the other side of your felt feet and attaching them to the pom pom (that is, the side without your little paw prints).
Once your pots are filled, it's time to gift!
You could gift these as is, or wrap each one in some cellophane, tying them with ribbon and adding a gift tag.
These bunny pots would also make the perfect placecard holders for your Easter table.
You could gift these as is, or wrap each one in some cellophane, tying them with ribbon and adding a gift tag.
These bunny pots would also make the perfect placecard holders for your Easter table.
Why not add a little mini "garden stake" to the top of the pot with each person's name. Simply get a skewer or toothpick, cut it to size and add some paper or washi tape to make a banner to add each person's name. Easy!
This post may contain affiliate links.


This is soooo cute. Nice job and Happy Easter
ReplyDeleteBeautiful idea and so cute
ReplyDeleteI love that idea! So funny, my doughter gonna love it:)
ReplyDeleteI have all the supplies and gonna make tomorrow to add to my display of goodies for spring.Thanks so much and a very happy spring to you n fam.
ReplyDelete